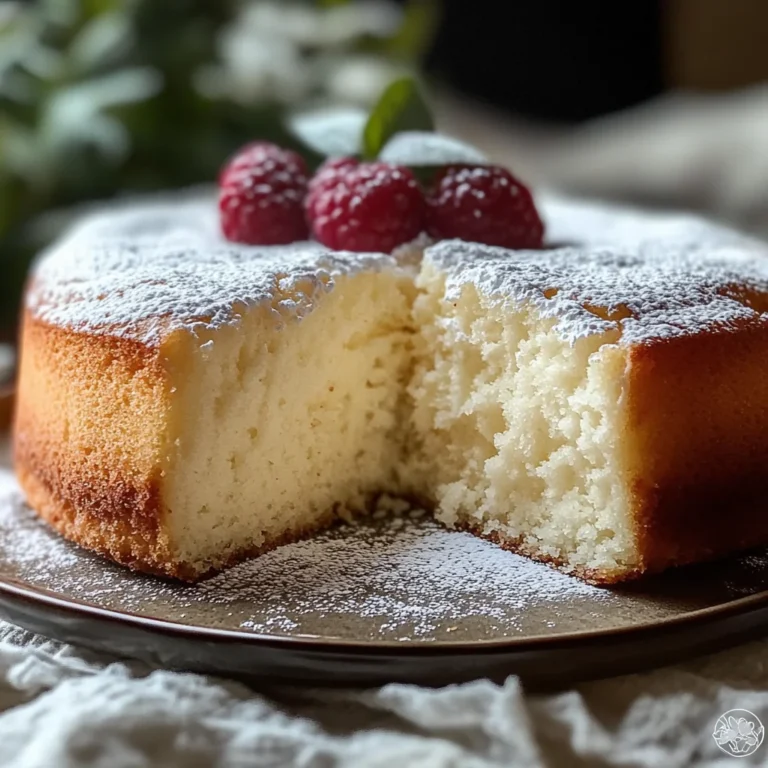
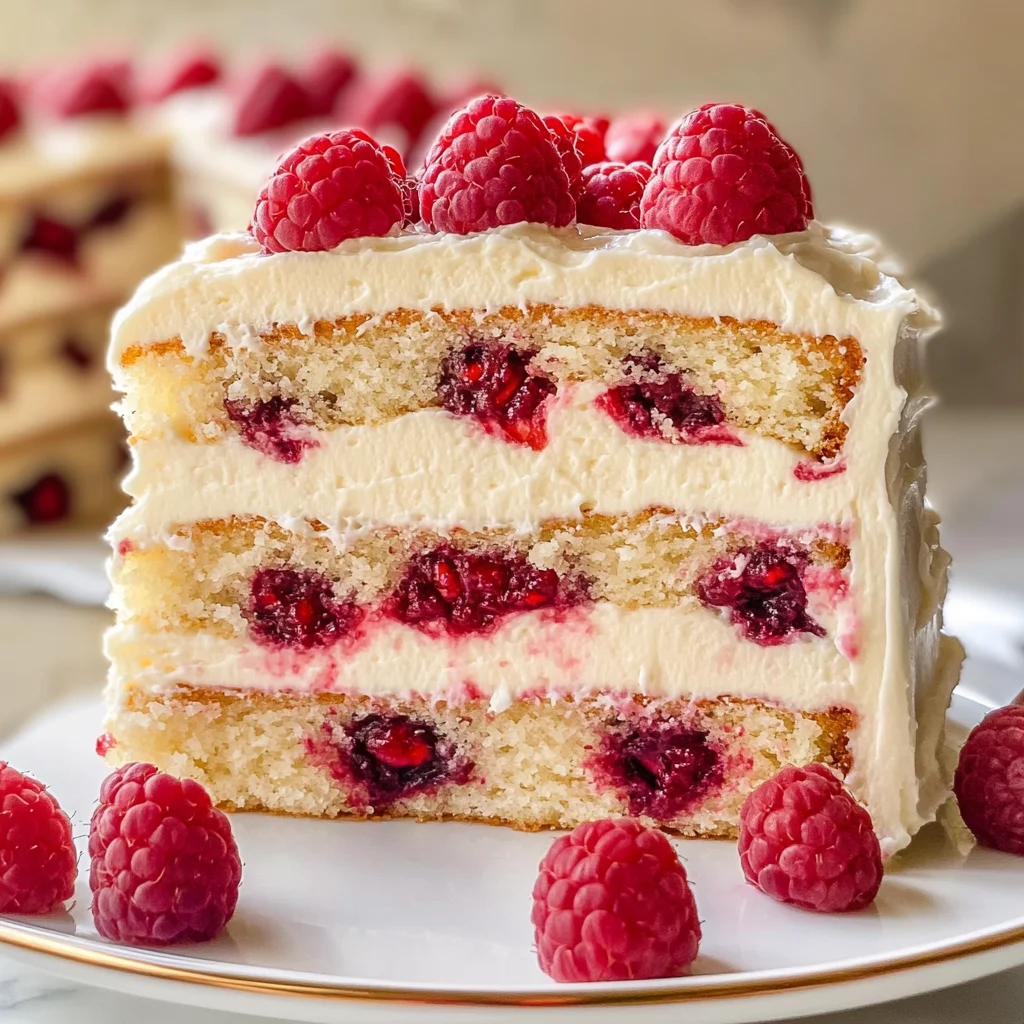
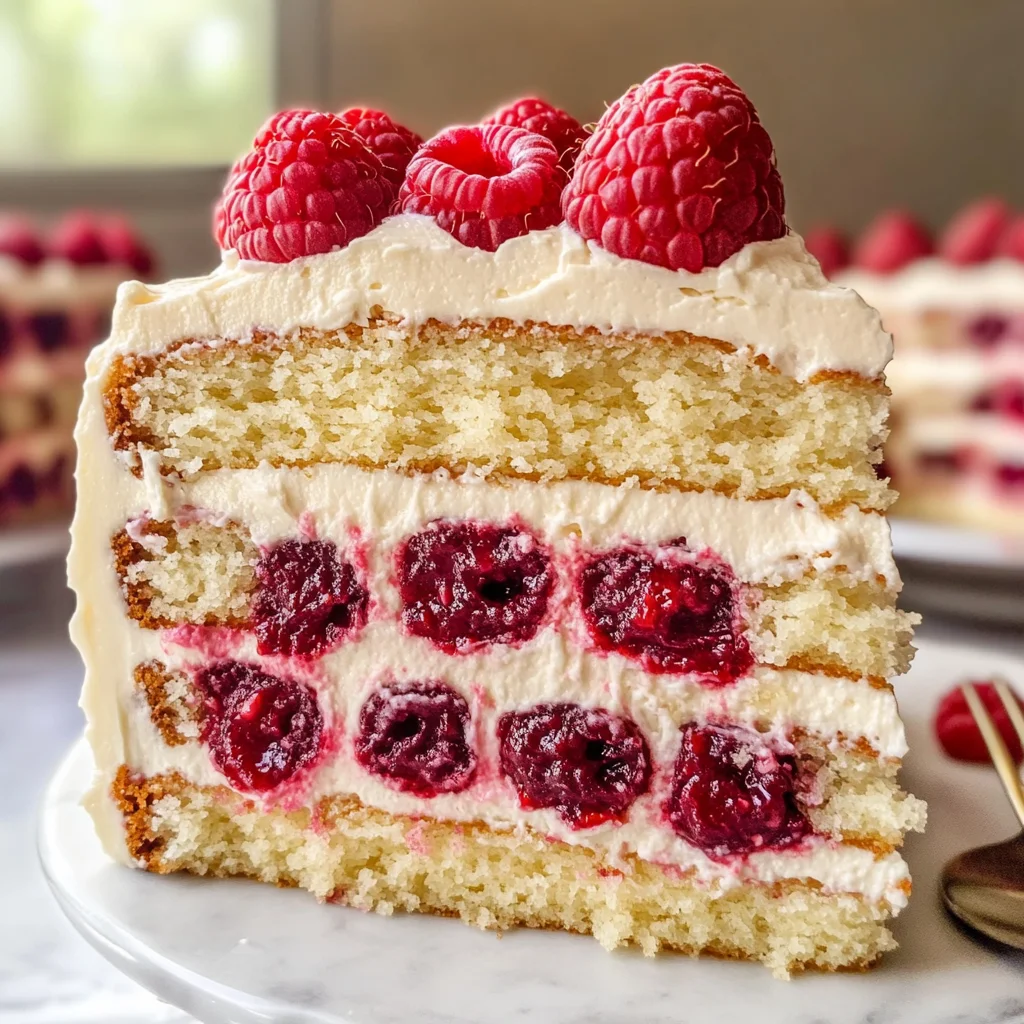
White Chocolate Raspberry Dream Cake
If you’re looking for a dessert that feels like a warm hug, then you’ve stumbled upon the right recipe! This White Chocolate Raspberry Dream Cake is not just a cake; it’s an experience that brings joy to any gathering. Whether it’s a family birthday party, a cozy weekend treat, or simply because you deserve something special, this cake is sure to impress.
What makes this cake so special? It’s the perfect balance of creamy white chocolate and fresh, tart raspberries that dance together in each bite. The layers of moist cake are enveloped in fluffy whipped cream, making it a delightful indulgence for anyone who tries it. Trust me, once you serve this at your next event, it will become one of your go-to recipes!
Why You’ll Love This Recipe
- Easy to Make: With simple steps and ingredients, you’ll have this delicious cake ready in no time.
- Perfect for Any Occasion: Whether it’s a holiday, birthday, or just a treat for yourself, this cake fits right in.
- Family Favorite: Kids love the sweetness of white chocolate and raspberries; adults appreciate the elegant flavor combination.
- Make-Ahead Convenience: Bake it the day before and let it chill overnight for even better flavor!
Ingredients You’ll Need
Let’s gather our simple and wholesome ingredients! You probably have most of these already in your kitchen. Each item plays an important role in creating that dreamy flavor and texture.
For the Cake
- 2 1/2 cups all-purpose flour
- 2 teaspoons baking powder
- 1/2 teaspoon baking soda
- 1/2 teaspoon salt
- 1 cup unsalted butter
- 1 1/2 cups granulated sugar
- 4 large eggs
- 1 teaspoon vanilla extract
- 1 cup whole milk
- 1/2 cup sour cream
- 6 ounces white chocolate, melted
For the Filling
- 1 1/2 cups fresh raspberries
- 1/2 cup raspberry jam
For the Whipped Cream
- 2 cups heavy whipping cream
- 2 tablespoons powdered sugar
- 1 teaspoon vanilla extract
Variations
This recipe is wonderfully flexible! Feel free to get creative with these variation ideas.
- Add Citrus Zest: Brighten up the flavors by adding lemon or orange zest to the batter or whipped cream.
- Change Up the Berries: Swap out raspberries for strawberries or blueberries for a different fruity twist!
- Go Gluten-Free: Use a gluten-free flour blend instead of all-purpose flour to make this cake accessible for everyone.
- Make It Mini: Bake in smaller round pans or muffin tins for adorable mini cakes that are easier to share.
How to Make White Chocolate Raspberry Dream Cake
Step 1: Preheat Your Oven
Preheating your oven is crucial! Set it to 350°F (175°C) so it’s ready when you are. A properly heated oven ensures even baking and helps your cake rise beautifully.
Step 2: Prepare Your Pans
Grease and flour two 9-inch round cake pans. This step prevents sticking and makes removing the cakes a breeze once they’re baked.
Step 3: Mix Dry Ingredients
In a medium bowl, whisk together the flour, baking powder, baking soda, and salt until well combined. This step ensures that your leavening agents are evenly distributed throughout the flour.
Step 4: Cream Butter and Sugar
In a large mixing bowl, cream together the butter and granulated sugar using an electric mixer on medium speed until light and fluffy—about 3-4 minutes. This process incorporates air into your mixture, leading to a light texture.
Step 5: Add Eggs
Add the eggs one at a time, beating well after each addition. This helps create an emulsion that makes your cake moist and rich.
Step 6: Incorporate Vanilla
Mix in vanilla extract until fully incorporated. The aroma will be heavenly!
Step 7: Combine Milk and Sour Cream
In another bowl, combine whole milk and sour cream until smooth. This creamy mix adds moisture and flavor depth to your batter.
Step 8: Combine Wet and Dry Ingredients
Gradually add dry ingredients to the butter mixture while alternating with the milk mixture. Start and end with dry ingredients to maintain structure in your cake.
Step 9: Add White Chocolate
Gently fold in melted white chocolate with a spatula until fully incorporated. The melted chocolate adds richness without overpowering other flavors.
Step 10: Divide Batter Among Pans
Pour equal amounts of batter into prepared pans. Smooth out tops with a spatula for even baking.
Step 11: Bake
Bake for 25-30 minutes or until a toothpick inserted comes out clean. Keep an eye on them—they’re almost done!
Step 12: Cool Cakes
Remove from oven and let cool in pans for about 10 minutes before transferring them onto wire racks. Cooling completely is crucial before adding any layers or toppings.
Step 13: Make Raspberry Filling
While cakes cool down, mash fresh raspberries in a bowl until broken down into small pieces. Mixing in raspberry jam gives it sweetness while keeping that tart flavor intact.
Step 14: Whip Cream
In yet another bowl, beat heavy whipping cream along with powdered sugar and vanilla extract until stiff peaks form—the key here is patience; don’t rush this step!
Step 15: Layer Your Cake
Once cakes are cooled completely, place one layer on your serving platter. Spread raspberry filling over it followed by whipped cream—repeat with second layer on top.
Step 16: Frost
Spread remaining whipped cream over top and sides of the entire cake. Look at how beautiful it’s coming together!
Step 17: Garnish
Finish by garnishing with fresh raspberries on top—arranging them can be fun!
Step 18: Chill Before Serving
Chill your gorgeous creation in the fridge for at least one hour before serving to let those layers set beautifully.
Now you’re ready to slice into this delightful White Chocolate Raspberry Dream Cake! Enjoy every moment of making—and eating—it!
Pro Tips for Making White Chocolate Raspberry Dream Cake
Baking this dreamy cake can be a delightful experience, especially with a few helpful tips to ensure it turns out perfectly!
-
Use room temperature ingredients: Bringing your eggs, butter, and milk to room temperature helps to create a smooth batter that incorporates air better, resulting in a fluffier cake.
-
Don’t overmix the batter: Gently folding in the melted white chocolate and alternating the dry and wet ingredients prevents gluten development, ensuring your cake remains tender and moist.
-
Cool cakes completely: Allowing the cakes to cool fully before frosting is crucial; it prevents the whipped cream from melting and gives you clean layers.
-
Make ahead: Prepare the raspberry filling and whipped cream a day in advance. This not only saves time but also allows flavors to meld beautifully.
-
Chill before serving: Letting the assembled cake chill in the refrigerator for at least an hour enhances its flavor and makes slicing easier!
How to Serve White Chocolate Raspberry Dream Cake
Presenting this elegant White Chocolate Raspberry Dream Cake is just as important as making it! Here are some creative ideas to make your dessert shine on any table.
Garnishes
-
Fresh mint leaves: A sprinkle of fresh mint adds a pop of color and a refreshing flavor that complements the sweetness of the cake.
-
Chocolate shavings: For an extra touch of indulgence, sprinkle some chocolate shavings over the whipped cream. It adds visual appeal and a bit of richness without overpowering the raspberry flavor.
Side Dishes
-
Vanilla ice cream: A scoop of creamy vanilla ice cream alongside each slice provides a delightful contrast to the tangy raspberries and sweet white chocolate.
-
Berry compote: Serving a warm berry compote made from mixed berries can elevate your dessert experience by adding another layer of fruitiness that pairs beautifully with the cake.
-
Lemon sorbet: The lightness and tartness of lemon sorbet is perfect for cleansing your palate between bites, making it an ideal companion for this rich dessert.
-
Coffee or tea: Offering a cup of freshly brewed coffee or herbal tea brings a comforting element to your dessert course, balancing out the sweetness of the cake while providing warmth and relaxation.
With these serving suggestions, your White Chocolate Raspberry Dream Cake will not only taste divine but also look stunning at any gathering! Enjoy every delicious bite!
Make Ahead and Storage
This White Chocolate Raspberry Dream Cake is perfect for meal prep, allowing you to savor the delightful flavors even after you’ve made it. Here’s how to keep it fresh and delicious!
Storing Leftovers
- Store any leftover cake in an airtight container in the refrigerator for up to 3 days.
- If you want to keep it longer, place a piece of wax paper between layers before sealing to prevent sticking.
Freezing
- Wrap individual slices or the entire cake tightly in plastic wrap, then aluminum foil to protect it from freezer burn.
- Frozen cake can last for up to 2 months. Just remember to label it with the date!
Reheating
- To enjoy your cake at room temperature, simply take it out of the refrigerator about 30 minutes before serving.
- If frozen, thaw it overnight in the refrigerator before bringing it to room temperature.
FAQs
Here are some common questions that might arise while making or enjoying this recipe.
Can I make a White Chocolate Raspberry Dream Cake ahead of time?
Absolutely! You can bake the cake layers in advance and store them wrapped in plastic in the fridge for up to 3 days or freeze them for longer storage. Just add the raspberry filling and whipped cream when you’re ready to serve!
What can I substitute if I can’t find fresh raspberries?
If fresh raspberries aren’t available, you can use frozen raspberries instead. Just make sure to thaw and drain any excess liquid before mashing them for the filling.
How do I ensure my White Chocolate Raspberry Dream Cake stays moist?
To keep your cake moist, be sure not to overbake it; checking with a toothpick is key. Additionally, using sour cream helps retain moisture throughout the baking process.
Can I use different types of chocolate for this cake?
While white chocolate pairs beautifully with raspberries, feel free to experiment with milk or dark chocolate if you’re looking for a different flavor profile. Just keep in mind that this will change the overall taste of the cake.
Final Thoughts
This White Chocolate Raspberry Dream Cake is not just a dessert; it’s an experience filled with delightful contrasts of flavors and textures. It’s perfect for celebrating special occasions or simply indulging on a cozy weekend afternoon. I hope you enjoy making this dreamy treat as much as I loved sharing it with you. Happy baking!
White Chocolate Raspberry Dream Cake

Indulge in the delightful experience of making this White Chocolate Raspberry Dream Cake, a dessert that perfectly balances creamy white chocolate with the tartness of fresh raspberries. This cake is not only a treat for your taste buds but also a beautiful centerpiece for any gathering. With its moist layers enveloped in fluffy whipped cream and vibrant raspberry filling, this cake is guaranteed to impress at birthdays, holidays, or simply as a sweet reward for yourself. Easy to make and even easier to enjoy, it’s destined to be a family favorite.
- Prep Time: 30 minutes
- Cook Time: 30 minutes
- Total Time: 1 hour
- Yield: Approximately 12 servings 1x
- Category: Dessert
- Method: Baking
- Cuisine: American
Ingredients
- 2 1/2 cups all-purpose flour
- 2 teaspoons baking powder
- 1/2 teaspoon baking soda
- 1/2 teaspoon salt
- 1 cup unsalted butter
- 1 1/2 cups granulated sugar
- 4 large eggs
- 1 teaspoon vanilla extract
- 1 cup whole milk
- 1/2 cup sour cream
- 6 ounces white chocolate, melted
- 1 1/2 cups fresh raspberries
- 1/2 cup raspberry jam
- 2 cups heavy whipping cream
- 2 tablespoons powdered sugar
Instructions
- Preheat your oven to 350°F (175°C) and grease two 9-inch round cake pans.
- In a bowl, whisk together flour, baking powder, baking soda, and salt.
- Cream butter and sugar until light and fluffy; add eggs one at a time.
- Mix in vanilla extract and combine milk with sour cream until smooth.
- Gradually alternate adding dry ingredients with the milk mixture; fold in melted white chocolate.
- Divide batter between prepared pans and bake for 25-30 minutes or until a toothpick comes out clean.
- Cool cakes completely before layering with raspberry filling made from mashed fresh raspberries mixed with raspberry jam, followed by whipped cream.
Nutrition
- Serving Size: 1 serving
- Calories: 390
- Sugar: 28g
- Sodium: 150mg
- Fat: 26g
- Saturated Fat: 15g
- Unsaturated Fat: 10g
- Trans Fat: 0g
- Carbohydrates: 35g
- Fiber: 1g
- Protein: 5g
- Cholesterol: 85mg