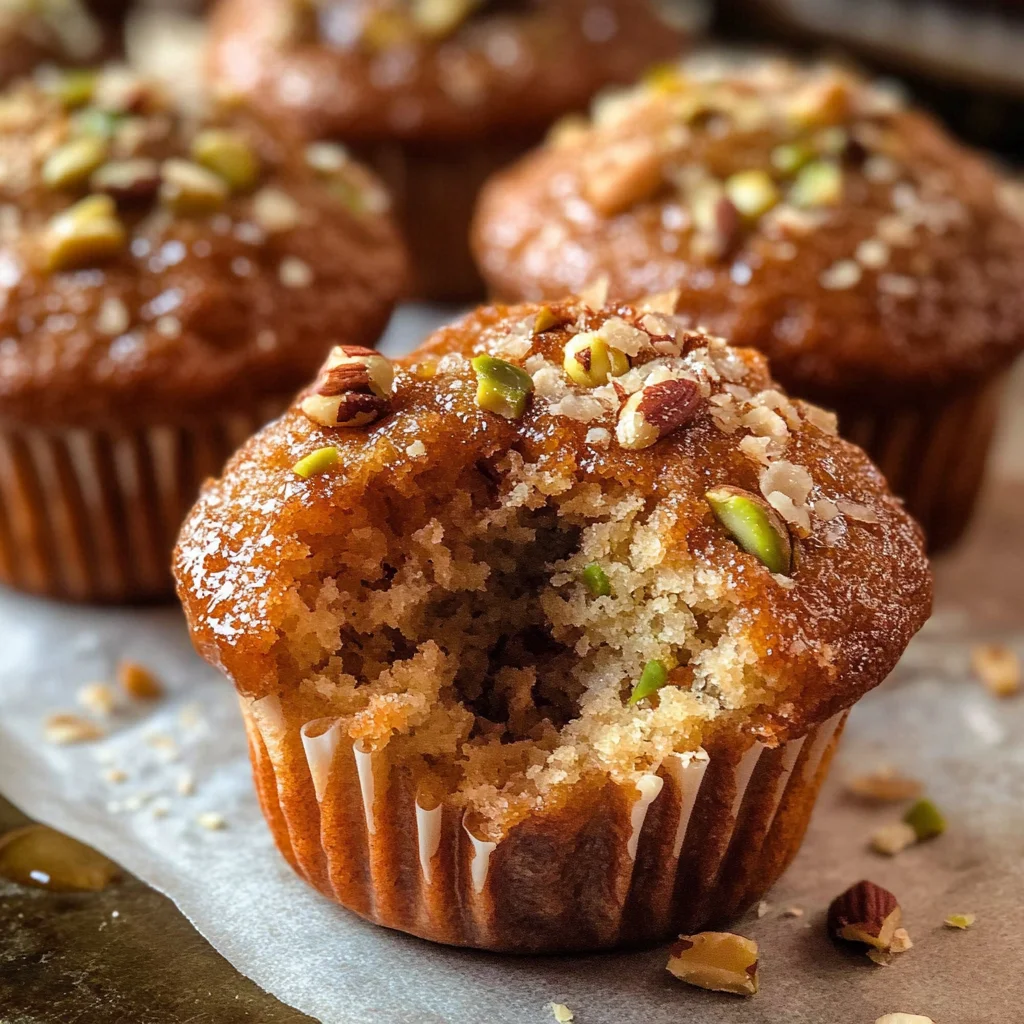
Baklava Muffins: The Perfect Fusion of Classic Greek Pastry and Modern Convenience
If you’re looking for a delightful treat that combines the rich flavors of classic Greek baklava with the convenience of muffins, then you’re in for a special experience! These Baklava Muffins: The Perfect Fusion of Classic Greek Pastry and Modern Convenience bring together sweet honey, crunchy nuts, and warm spices in a way that makes them not just delicious but also easy to prepare. Whether you’re hosting a family gathering or simply enjoying a cozy night in, these muffins are sure to impress.
What I love most about this recipe is how it captures the essence of baklava while being perfect for any occasion. They make wonderful snacks for busy weeknights or sweet additions to brunch gatherings. You’ll be amazed at how quickly they come together, making them a go-to in my kitchen!
Why You’ll Love This Recipe
- Easy to Make: These muffins come together quickly with simple steps, so even novice bakers can shine.
- Family-Friendly: With their sweet flavors and nutty crunch, everyone will love them – kids included!
- Make-Ahead Convenience: Bake these muffins ahead of time and enjoy them throughout the week for breakfast or snacks.
- Versatile Treat: Perfect for gatherings or just a little indulgence at home; they fit any occasion beautifully.
- Delicious Flavor: The combination of nuts and spices makes each bite a taste sensation reminiscent of traditional baklava.
Ingredients You’ll Need
Let’s gather some simple and wholesome ingredients to create these delicious Baklava Muffins! You might already have many of these items in your pantry, making it even easier to whip up this delightful treat.
For the Muffins
- 1 cup all-purpose flour
- 1 teaspoon baking powder
- 1/4 teaspoon salt
- 1/2 cup unsalted butter, melted
- 1/2 cup granulated sugar
- 1/4 cup honey
- 1/4 cup milk
- 1 teaspoon vanilla extract
For the Nut Mixture
- 1/2 cup finely chopped walnuts
- 1/4 cup finely chopped pistachios
- 1/4 cup finely chopped almonds
- 1/2 teaspoon ground cinnamon
- 1/4 teaspoon ground cloves
For Drizzling
- 1/4 cup honey (for drizzling after baking)
Variations
This recipe is wonderfully flexible, allowing you to personalize it based on your tastes or available ingredients. Here are some fun variations to consider:
- Add Dried Fruits: Toss in some finely chopped dried apricots or figs for an extra layer of sweetness.
- Try Different Nuts: Use hazelnuts or pecans instead of walnuts for a unique flavor twist.
- Spice it Up: Add a pinch of nutmeg or cardamom alongside the cinnamon for different aromatic notes.
- Make It Chocolatey: Fold in some mini chocolate chips along with the nut mixture for a decadent touch.
How to Make Baklava Muffins: The Perfect Fusion of Classic Greek Pastry and Modern Convenience
Step 1: Preheat Your Oven
Start by preheating your oven to 350°F (175°C). This ensures that your muffins bake evenly from the moment you put them in. While your oven heats up, line your muffin tin with paper liners or grease it well so that your muffins release easily after baking.
Step 2: Combine Dry Ingredients
In a large bowl, whisk together the flour, baking powder, and salt. This step is crucial as it helps incorporate air into the flour mixture, ensuring your muffins rise nicely. It also evenly distributes the leavening agent.
Step 3: Mix Wet Ingredients
In another bowl, combine melted butter, granulated sugar, honey, milk, and vanilla extract. Mixing these wet ingredients until well combined creates a rich base that adds moisture and flavor to your muffins.
Step 4: Bring It Together
Pour the wet mixture into the dry ingredients and stir gently until just combined. Be careful not to overmix here; you want your muffins tender and fluffy! Overmixing can lead to dense baked goods.
Step 5: Prepare the Nut Mixture
In a small bowl, mix together the finely chopped walnuts, pistachios, almonds, ground cinnamon, and ground cloves. This step not only adds flavor but also texture. The nuts will provide that signature crunch synonymous with baklava.
Step 6: Fold in Nuts
Gently fold this nut mixture into the muffin batter until incorporated. This is where all those wonderful flavors come together; make sure you don’t break down the nuts too much while folding!
Step 7: Fill Muffin Tin
Spoon your batter into the prepared muffin tin cups until they are about 2/3 full. This allows space for rising without overflowing during baking.
Step 8: Bake Away!
Pop your muffin tin into the oven and bake for about 18-20 minutes. Keep an eye on them; they are done when a toothpick inserted into the center comes out clean. The smell wafting through your kitchen will be heavenly!
Step 9: Cool Down
Once baked to perfection, remove them from the oven and let them cool in the muffin tin for about five minutes before transferring them to a wire rack. This short cooling period helps set their shape while still being warm enough for drizzling.
Step 10: Drizzle with Honey
While still warm, drizzle each muffin with honey for that irresistible finishing touch. This adds sweetness on top of all those wonderful flavors inside!
With just about 35 minutes from start to finish, you have created something truly special! Enjoy these Baklava Muffins as part of breakfast or as a delightful snack throughout your day.
Pro Tips for Making Baklava Muffins: The Perfect Fusion of Classic Greek Pastry and Modern Convenience
Baking is a delightful journey, and a few tips can turn your Baklava Muffins into an extraordinary treat!
-
Use room temperature ingredients: Bringing your butter, milk, and eggs to room temperature helps them mix more easily, resulting in a smoother batter and fluffier muffins.
-
Don’t overmix the batter: Mixing just until combined ensures your muffins stay tender. Overmixing can lead to dense muffins; we want them light and airy!
-
Experiment with nuts: While walnuts, pistachios, and almonds are traditional, feel free to mix in some pecans or hazelnuts for a unique twist on flavor and texture.
-
Store properly: To keep your muffins fresh longer, store them in an airtight container at room temperature. You can also freeze them for up to three months; just thaw before enjoying!
-
Adjust sweetness to taste: If you prefer a less sweet muffin, reduce the amount of honey or sugar slightly. Remember, the drizzle of honey adds sweetness afterward too!
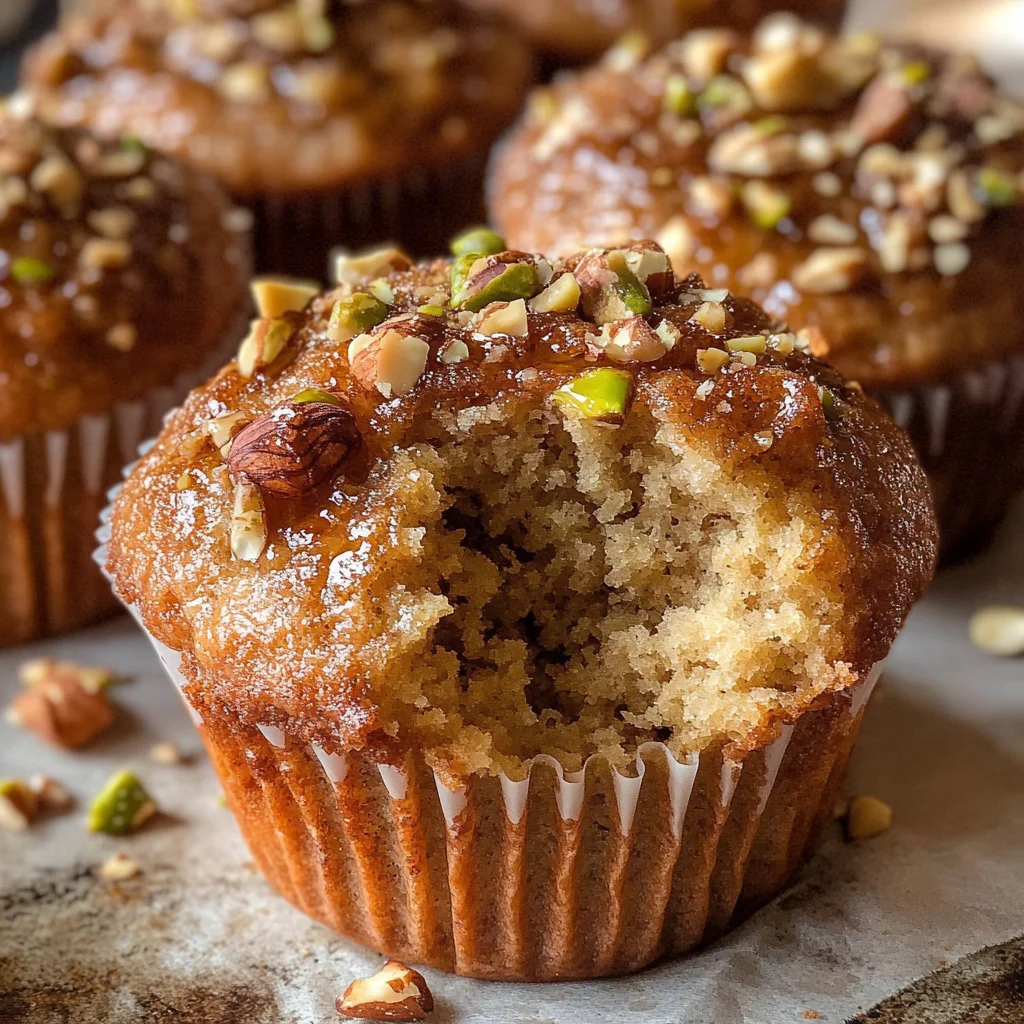
How to Serve Baklava Muffins: The Perfect Fusion of Classic Greek Pastry and Modern Convenience
Presenting Baklava Muffins in an appealing way can enhance their charm! These delightful treats can be served as breakfast bites or dessert indulgences. Here are some serving suggestions that will impress your guests.
Garnishes
- Chopped nuts: Sprinkle some extra chopped walnuts or pistachios on top for added crunch and visual appeal.
- Cinnamon dusting: A light dusting of ground cinnamon over the muffins before serving adds aroma and enhances the flavor profile.
Side Dishes
- Greek yogurt: Serve with a dollop of Greek yogurt for a creamy contrast that balances the sweetness of the muffins.
- Fresh fruit salad: A refreshing fruit salad on the side can complement the rich flavors, providing a lightness that pairs beautifully.
- Herbal tea: Offer a warm cup of herbal tea like chamomile or mint to enhance the experience with soothing aromas that pair well with sweets.
- Coffee: A nice cup of coffee brings out the nutty flavors in these muffins, making it a perfect match for brunch gatherings.
With these serving ideas and pro tips in your arsenal, your Baklava Muffins will not only taste divine but also look enticing on any table! Enjoy every bite!
Make Ahead and Storage
These Baklava Muffins are not only delicious but also perfect for meal prep! You can make a batch ahead of time and enjoy them throughout the week. Here’s how to store them properly to maintain their freshness.
Storing Leftovers
- Allow the muffins to cool completely.
- Place them in an airtight container at room temperature for up to 3 days.
- For longer shelf life, refrigerate them in an airtight container for up to a week.
Freezing
- Wrap each muffin individually in plastic wrap or aluminum foil.
- Place wrapped muffins in a freezer bag or container, removing as much air as possible.
- Freeze for up to 3 months for best quality.
Reheating
- To reheat from frozen, remove the wrapping and microwave on high for about 30 seconds or until warm.
- If thawed, you can also reheat in the oven at 350°F (175°C) for about 5-10 minutes for a freshly baked taste.
FAQs
If you have some questions about these delightful muffins, you’re not alone! Here are some common inquiries:
Can I use other nuts in Baklava Muffins?
Absolutely! Feel free to substitute walnuts, pistachios, or almonds with your favorite nuts or seeds for a personalized twist.
How long do Baklava Muffins: The Perfect Fusion of Classic Greek Pastry and Modern Convenience last?
When stored properly, these muffins can last up to 3 days at room temperature or up to a week in the refrigerator. If frozen, they can be kept for about 3 months!
Can I make Baklava Muffins ahead of time?
Yes! These muffins are great for meal prep. You can bake them ahead of time and store them as directed for quick snacks and breakfasts throughout the week.
What is the best way to serve Baklava Muffins?
Serve these muffins warm, drizzled with honey right after baking. They’re perfect alongside tea or coffee!
Final Thoughts
I hope you enjoy making these Baklava Muffins as much as I do! They bring together the classic flavors of baklava with the convenience of muffins—perfectly suited for any sweet occasion. Whether you’re looking for a delightful breakfast treat or a comforting dessert, these muffins are sure to please. Happy baking, and don’t forget to share your creations with friends and family!
Baklava Muffins: The Perfect Fusion of Classic Greek Pastry and Modern Convenience

Indulge in the delightful experience of Baklava Muffins, where traditional Greek flavors meet modern muffin convenience. These muffins are a heavenly blend of sweet honey, crunchy nuts, and aromatic spices that will enchant your taste buds. Ideal for breakfast, brunch, or as an after-dinner treat, they are simple to prepare and perfect for sharing with family and friends. With their tender texture and rich flavor, you’ll find these muffins become a staple in your baking repertoire. Enjoy the warm notes of cinnamon and the satisfying crunch of nuts in every bite, topped with a drizzle of honey for that extra touch of sweetness.
- Prep Time: 15 minutes
- Cook Time: 20 minutes
- Total Time: 35 minutes
- Yield: Approximately 12 muffins 1x
- Category: Dessert
- Method: Baking
- Cuisine: Greek
Ingredients
- 1 cup all-purpose flour
- 1 teaspoon baking powder
- 1/4 teaspoon salt
- 1/2 cup unsalted butter, melted
- 1/2 cup granulated sugar
- 1/4 cup honey
- 1/4 cup milk
- 1 teaspoon vanilla extract
- 1/2 cup finely chopped walnuts
- 1/4 cup finely chopped pistachios
- 1/4 cup finely chopped almonds
- 1/2 teaspoon ground cinnamon
- 1/4 teaspoon ground cloves
Instructions
- Preheat your oven to 350°F (175°C) and prepare a muffin tin.
- In a large bowl, whisk flour, baking powder, and salt.
- In another bowl, mix melted butter, sugar, honey, milk, and vanilla until combined.
- Pour wet ingredients into dry ingredients and stir gently until just combined.
- In a small bowl, combine walnuts, pistachios, almonds, cinnamon, and cloves; fold into the batter.
- Fill muffin cups about two-thirds full with batter.
- Bake for 18-20 minutes or until a toothpick comes out clean.
- Allow to cool slightly before drizzling with honey.
Nutrition
- Serving Size: 1 muffin (60g)
- Calories: 210
- Sugar: 14g
- Sodium: 120mg
- Fat: 9g
- Saturated Fat: 5g
- Unsaturated Fat: 3g
- Trans Fat: 0g
- Carbohydrates: 30g
- Fiber: 1g
- Protein: 3g
- Cholesterol: 25mg